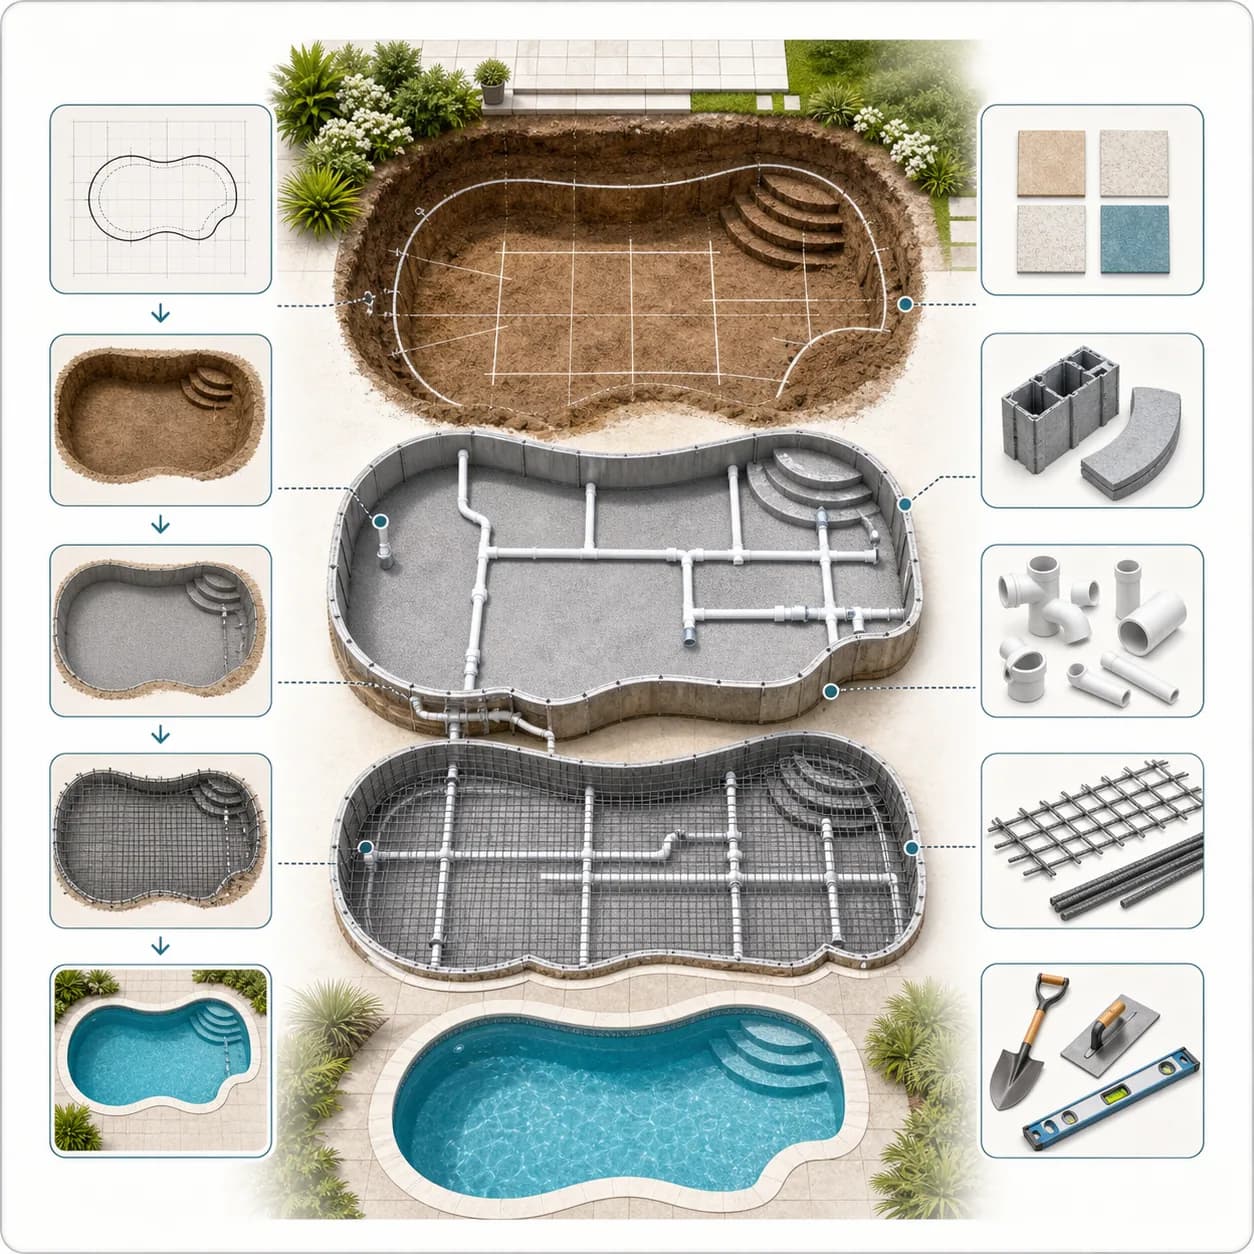
Before excavation, establish the pool's exact position, the ground conditions, how rainwater and groundwater will drain, and access for machinery, materials and future servicing. Confirm dimensions and levels, locate underground services, position the equipment area and specify the base required by the chosen pool. A level surface alone is not enough if the layers below it settle or water collects against the structure.
Written and edited by: Pool Explained editorial team
Check that your chosen location is suitable
Start with actual dimensions, not a catalogue photograph. Mark out the shell or structure, excavation and assembly space, the future deck width and access route. Add space for equipment, the cover, ladder or steps. This shows whether there will be enough room to use and service the pool normally.
Observe sunshine and wind through much of the day. Sunshine can help warm the water, but a position without shade is not automatically best. Strong wind increases evaporation and carries in dirt, while trees can add leaves, roots and cleaning. Also consider privacy, the view from the house and whether an adult can see the pool when children are in the garden.
Before digging, check property boundaries, distances from buildings, existing pipes and cables, and local requirements for construction and protective fencing. Do not assume where underground services run. If records are unreliable, locate them on site before the excavator arrives. Moving the pool is still relatively easy then; after excavation, changes become much more expensive.
Check construction access too. Gate width, sharp turns, canopies, overhead cables and the strength of the approach may restrict an excavator, lorry, concrete pump, crane or finished shell. If large machinery cannot get in, the work may still be possible with different equipment and more manual labour, but establish the extra cost before signing.
Specify the base for the soil and finished levels
Not all level ground has sufficient bearing capacity. Naturally compacted soil, old fill, clay, sand and recently levelled ground behave differently under the weight of water. One cubic metre of water weighs approximately one tonne, so even a small family pool applies a substantial, lasting load. For a permanent in-ground pool or uncertain ground, professional assessment is money well spent.
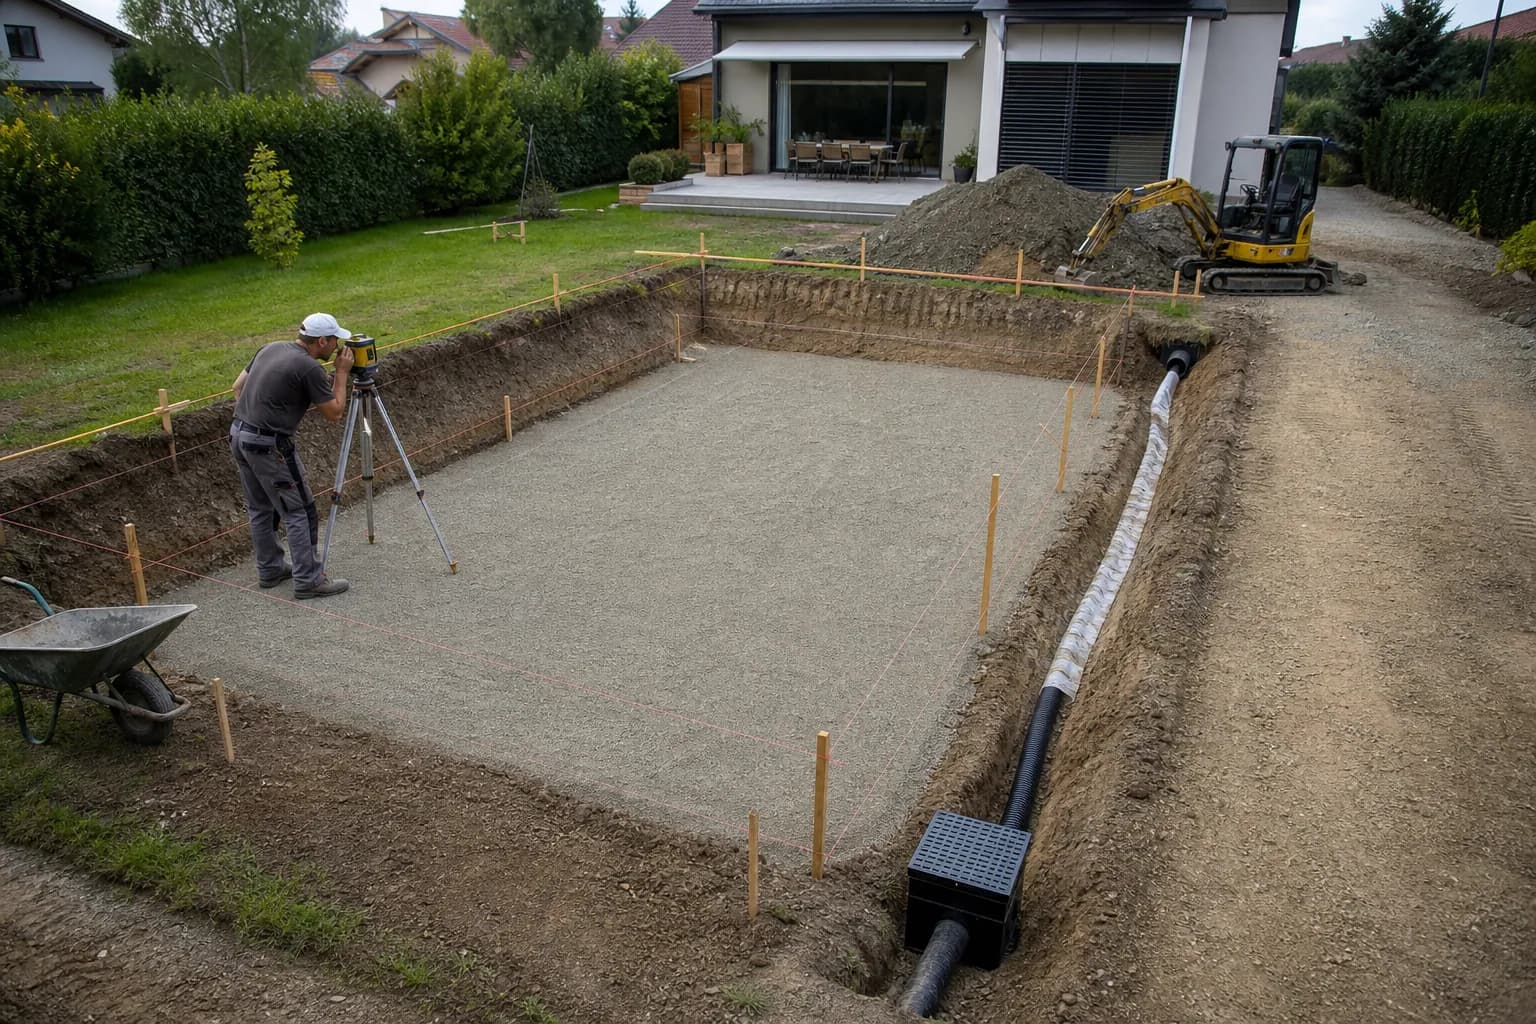
Set a single reference level for the pool floor, top edge, deck, nearby thresholds and drainage falls. If contractors use different reference points, the mistake may not become apparent until the finish is installed. Measure levels with a laser and record them rather than estimating by eye.
Build the base to the design and the specific system's instructions. An above-ground pool, fibreglass shell and reinforced concrete pool do not all need the same layers. Loose sand is not a universal way to correct a slope: it can move or wash away. Specify materials, layer thicknesses, compaction and permitted tolerances in the quotation or technical description.
Do not stop checking when the base looks smooth. Verify dimensions, diagonals, levels and flatness before the pool arrives or the next construction stage begins. Under an above-ground pool, unevenness shows at the waterline and loads the structure unevenly. Under a permanent pool, a faulty base may later cause deck settlement, shell movement or cracked finishes.
Plan drainage for rainwater and groundwater
Decide where water will go before excavation. Rain from the roof, deck and higher ground must not run into the excavation, against the shell or into the equipment area. Finished falls should direct water away from the pool and house without transferring the problem to a neighbouring property. The discharge point must be permitted, accessible and low enough for the system to work.
Water in the excavation is not always just the result of one downpour. It may indicate groundwater, poorly draining soil or inflow from higher ground. This can change the drainage design, structure, filling sequence and future draining procedure. Pumping water out during construction may be necessary temporarily, but is not a substitute for a permanent solution.
Design drainage so it can be inspected and maintained. If it includes a drain pipe, chamber or pump, record its location, discharge point and how it will be checked once the garden is finished. Photograph the installation with a measuring tape before backfilling and make a simple drawing. Without those records, a fault or blockage may mean exploratory digging around the finished deck.
Protect the equipment area from surface water and flooding. It also needs drainage for accidental leaks and servicing water. Without a drain, water from a loose connection can damage electrical and hydraulic equipment. Set door, hatch and ventilation positions while planning levels, not after construction.
Coordinate the connected parts of the job before excavation
Show the pool, equipment area, pipe and cable routes, drainage, heating, top-up supply, lighting and future deck on one plan. You do not need to read drawings like a designer, but you should receive an explanation of what is being installed and who is responsible for each stage. Coordinate construction and services before work starts.
Agree the inspection sequence. Inspect the excavation before laying the base, the base before placing the pool, pipes and fittings before backfilling, and deck falls before the final finish. Identify who approves progress at each point. Once the next stage conceals the previous one, inspection is more expensive and may require breaking work out.
Decide where excavated soil will be stored and how much must leave the property. Loose excavated soil takes up more space than it did in the ground. A pile beside the excavation can obstruct access and add load to its edge. Include removal costs before work unless you know all the soil can safely remain on site.
You are ready to start when positions and levels are marked, access is confirmed, ground and water conditions are assessed, the base is specified and services are coordinated. Resolve any unanswered questions before excavation. Otherwise, you will be making decisions while machinery and contractors are already on site, usually increasing both costs and delays.