The most expensive pool installation mistakes are often concealed beneath the base, soil or finished deck. Inspect the work in stages: position and levels before excavation, ground and drainage before the base, pipes and electrics before backfilling, and operation and paperwork before handover. If the contractor cannot provide drawings, measurements, test results and access to the equipment, adding the finish will conceal those shortcomings rather than fix them.
Written and edited by: Pool Explained editorial team
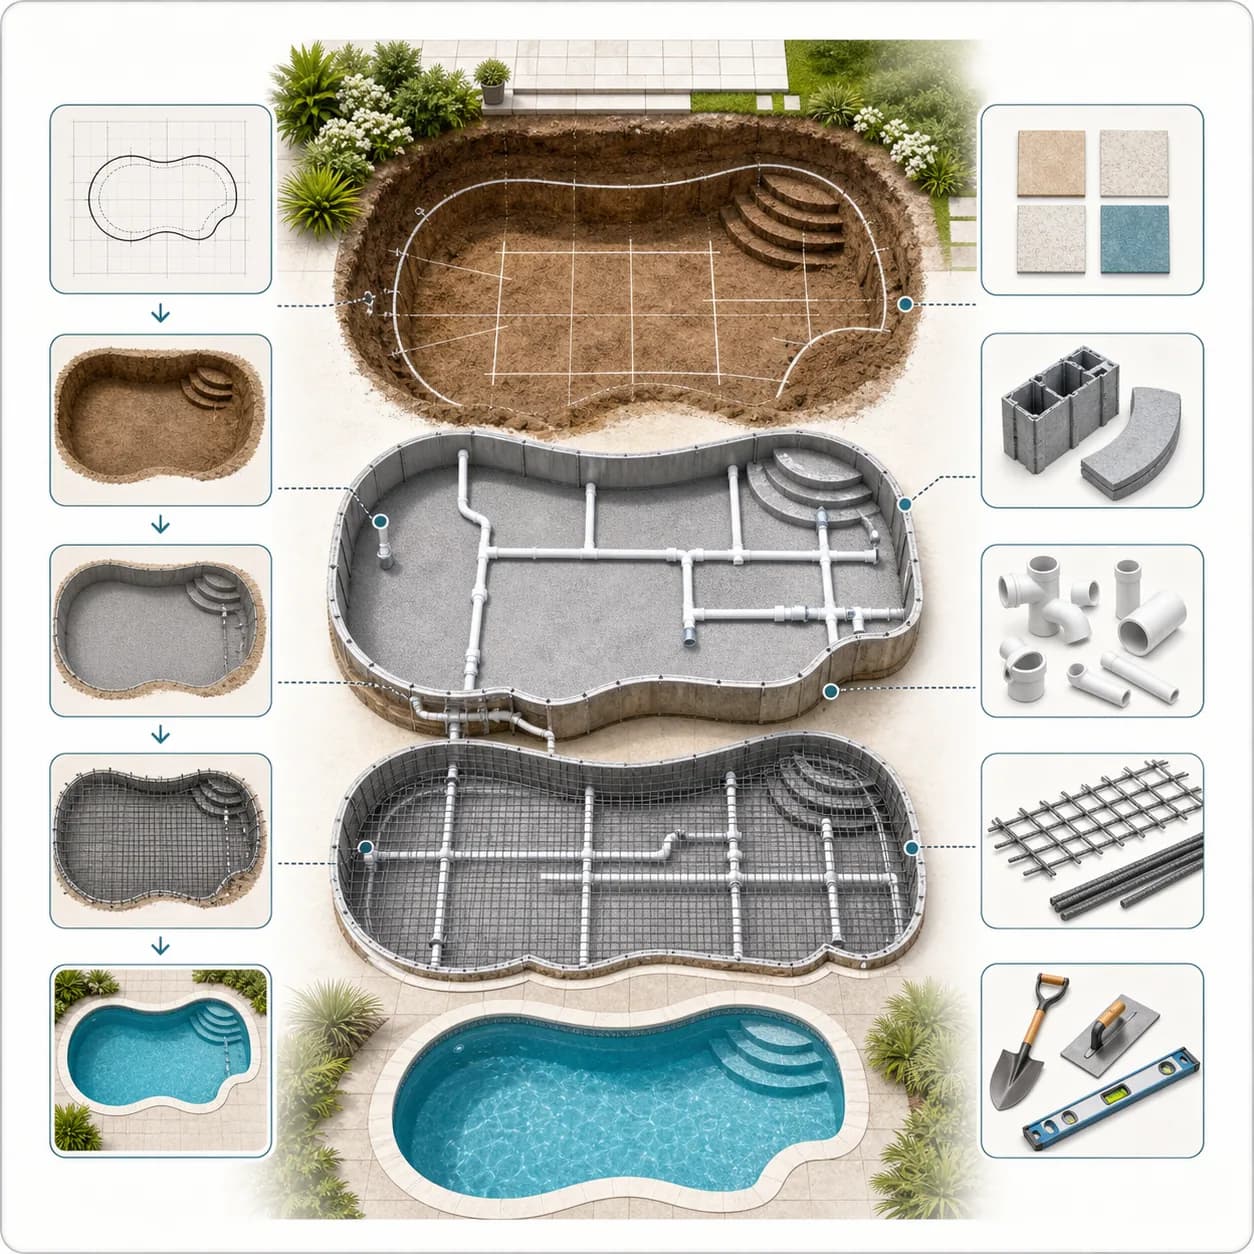
Record the key decisions before work starts
Before excavation, confirm the pool type and model, internal and external dimensions, top-edge level, deck width, steps and equipment location. Changing these after the hole is dug also changes quantities, service routes and finished levels. A verbal agreement is difficult to check when two teams remember different versions.
The quotation should list what is included: setting out, excavation, spoil removal, the base, drainage, structure, pipes, electrics, equipment, backfill, deck and commissioning. For measured work, specify the unit and rate. Agree separately what happens if the team encounters rock, fill, groundwater or an unidentified service.
Appoint someone to coordinate the contractors and approve each stage. If the builder, plumber and electrician work independently, a pipe can end up where a foundation is planned, a drain may have insufficient fall, or the equipment enclosure may be finished before anyone checks filter access.
A change during construction is not necessarily a problem, but it needs an explanation and a written record. Before extra work, obtain the reason, cost, effect on timing and give your approval, except where urgent action is needed to prevent immediate damage. Update the final drawing to show what was built.
Set a schedule for specific stages, not just a promised completion date. Make clear when excavation should finish, when the base is inspected, when pipes are tested and what must be complete before decking. Allow for curing, testing and possible rain delays. Do not let the next team cover uninspected work, even if the project is late. Repairs later will cost more and take longer.
Base and drainage problems may not appear immediately
Loose or unevenly compacted ground may settle beneath the pool or deck. Later signs include an uneven waterline, a shifted structure, a depression or a crack. Do not correct the base with an unspecified material simply because it is easy to spread. Layers, compaction and final flatness must suit the particular pool system.
Do not backfill an excavation that is collecting water until you know its source. Groundwater and surface water can undermine the base, load an empty shell or flood the equipment area. Drainage must discharge to a suitable location and remain accessible for checking. A pipe ending in already saturated ground is not enough.
The finished deck must drain rainwater away from the pool, house and equipment. Incorrect falls send dirty runoff into the pool or let it collect by a threshold or the equipment area. Check falls before fixing the finish. Correcting them afterwards often means removing material you have just paid for.
For prefabricated shells and modular systems, follow the manufacturer's sequence for filling and backfilling. Backfilling too quickly or unevenly can shift or distort a wall. Keep heavy machinery outside the clearances required by the design and ground conditions. Measure the shell and wall positions rather than relying on the excavator operator's visual judgement.
Test and photograph services before concealing them
A pipe that does not leak during a brief pump run has not necessarily been adequately tested. Agree the specified test for the materials and system, and retain the result. Inspect joints, valves and fittings while they remain visible. Repairs then can be made without breaking the deck or searching underground for a leak.
Photograph the services so a technician can locate them accurately later. Include a fixed reference point and measuring tape, depths, crossings, joints, valves, drainage and penetrations. Make a simple drawing too. After a few years, grass, paving and furniture can make the area look completely different; do not rely on the installer's memory.
Keep the equipment accessible. Leave enough room to open the filter, reach the pump and operate every valve without dismantling other items. Poor access increases maintenance costs and makes routine servicing harder. Check the space against actual equipment dimensions before building walls, hatches and finishes.
Have electrical work carried out by a qualified contractor and properly inspected. Wet areas, metalwork and pool lighting require the specified protection, earthing and equipotential bonding. Never bypass a protective device that trips or replace it with a higher-rated one without finding the cause.
Finish handover with a test run and complete records
Before the final payment, inspect the system with the contractor. Run the pump, check flow at the jets, joints for leaks, clean-filter pressure and the operation of additional equipment. Have the valve positions and their purposes demonstrated safely. Seeing the system operate tells you far more than looking at it switched off.
Request a list of installed equipment with exact models and serial numbers, manuals, invoices and warranty terms. Record initial settings, filter pressure and the recommended cleaning and winterising procedures. Warranties for the shell, lining, equipment and installation may differ in both duration and conditions, so retain them separately.
Check the finished surroundings: drainage falls, sharp edges, ladder and handrail stability, suction covers, the gate and protective fence. Deck runoff must not drain towards the house, and children must not be able to reach the pool unsupervised. Complete all safety measures before normal use begins.
List any defects in a handover record with deadlines for correction. A small scratch and a leak at a buried joint carry different risks, so prioritise accordingly. Accept the pool when the agreed checks are complete, it operates safely and you have all the documentation. A photograph of a filled pool cannot establish this.